Building a Secure CI/CD Pipeline
Building a Secure CI/CD Pipeline for a Python App: From Code to Render Deployment
Modern web development isn’t just about building cool apps, it’s about building secure, automated, and production-ready systems. In this post, we walk through how I built, secured, and deployed a Python-based web application with an end-to-end CI/CD pipeline using GitLab, Render, and industry-standard security tools like Semgrep, Bandit, Trivy, and Snyk.
Whether you’re a DevOps enthusiast or a security conscious developer, this guide will show you how to shift security left, streamline deployment, and automate reporting, all in one place
Overview of the Stack
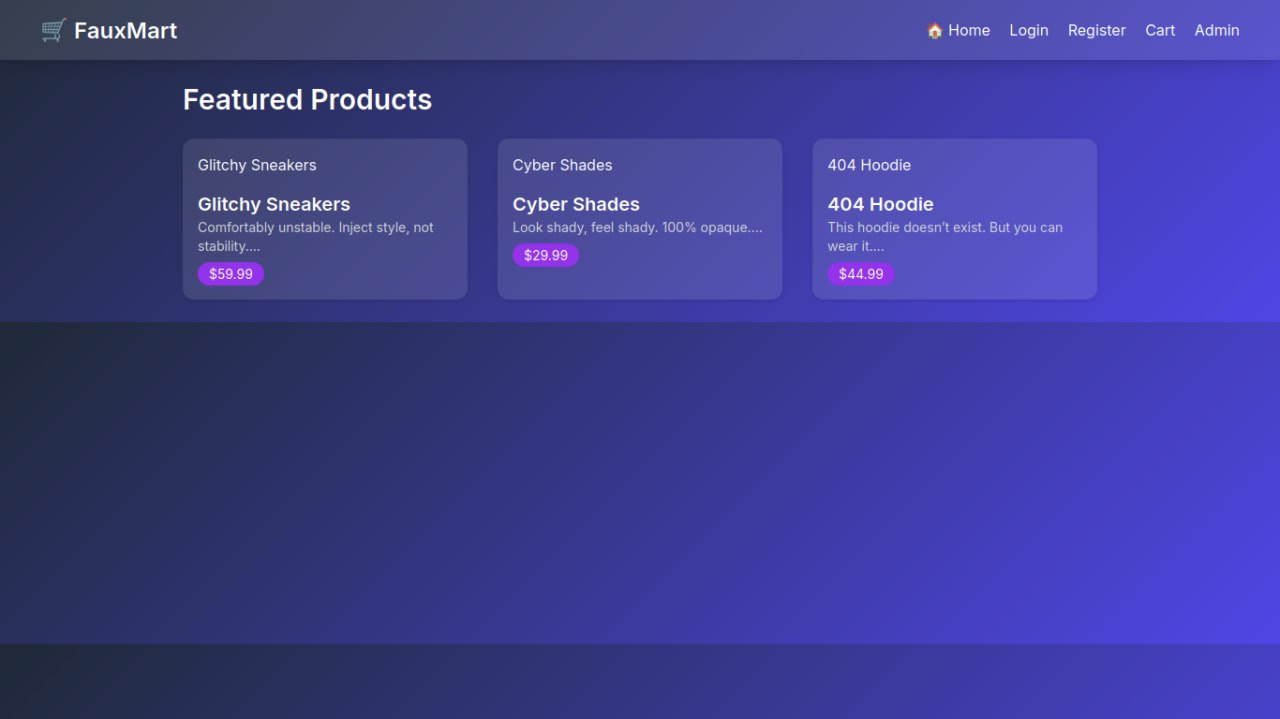
App: Python web app (Flask-based)
CI/CD: GitLab Pipelines
Hosting: Render
Security Tools:
Semgrep for static code analysis
Bandit for Python-specific SAST
Snyk for dependency scanning
Trivy for filesystem + container scanning
Alerting: Telegram integration with summarized report
Step 1: Building the App
I started with a lightweight Flask app, containing routes, business logic, and templates. The key focus at this stage was to write minimal but functional code to serve as the base for our secure deployment.
Sample structure:
1
2
3
4
5
fauxmart/
├── app.py
├── requirements.txt
├── templates/
└── Dockerfile
The requirements.txt contained typical dependencies like Flask, while the Dockerfile defined a production-ready image using a minimal base (e.g., python:3.10-slim). Link to the demo-app can be found
Step 2: Creating the CI/CD Pipeline in GitLab
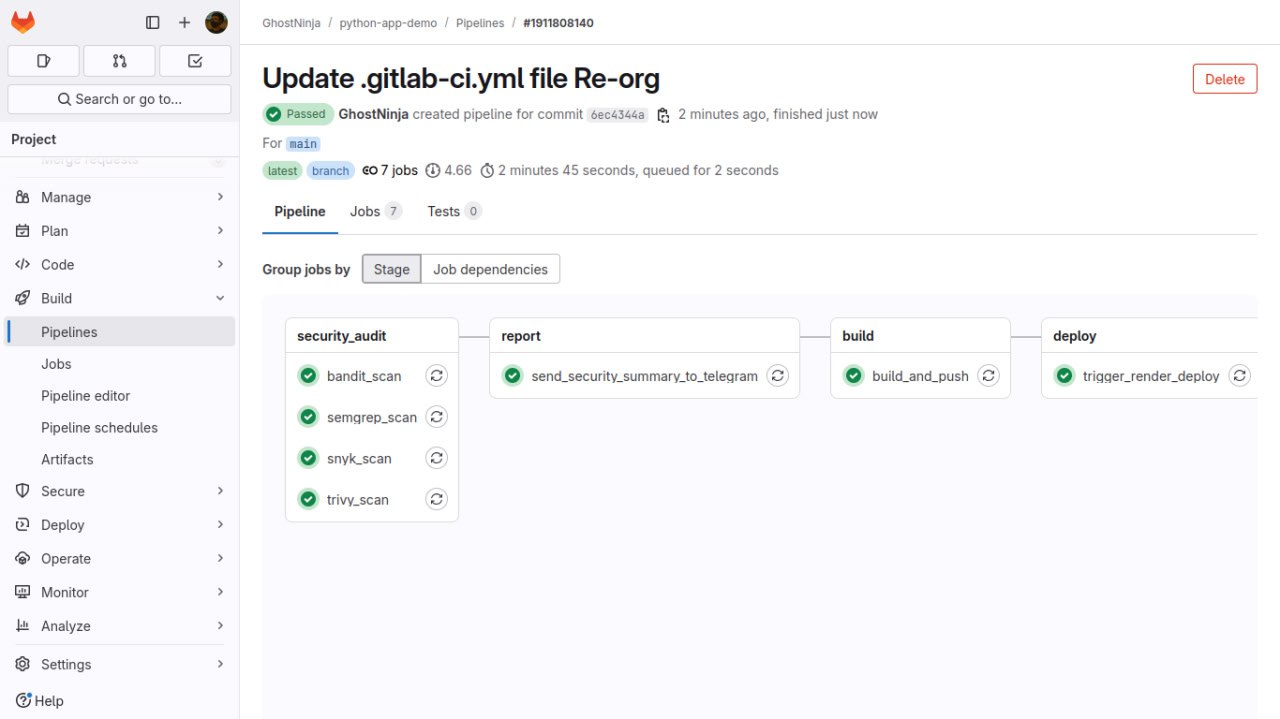
Next, I created a robust .gitlab-ci.yml that followed a secure-first, build-later approach using three main stages:
CI/CD Pipeline Stages:
1
2
3
4
- security_audit   # Perform all security scan
- report           # Generate and send summary
- build            # Build & push Docker image
- deploy           # Trigger Render deployment
I’m using gitlab here because I need to ght more familiar with it. Already used to Github action, in which I once built a mini pipeline security on before.(Vulnera).
Step 3: Integrating Security Tools
Security is not just some checkbox, it’s a continuous process. I embedded 4 security tools directly into the pipeline:
Semgrep - Static Code Scanning
1
2
3
4
 semgrep_scan:
 image: returntocorp/semgrep:latest
 script:
     - semgrep --config .semgrep.yml . --json --metrics=off > semgrep_results.json
Semgrep detects hardcoded secrets, missing CSRF tokens, and exposed admin routes, among others.
- Bandit - Python-Specific SAST ```yaml bandit_scan: image: python:3.10 script:
- pip install bandit
- bandit -r . -f json -o bandit_results.json
``` Bandit catches Python-specific issues like insecure hash functions, wildcard imports, and more
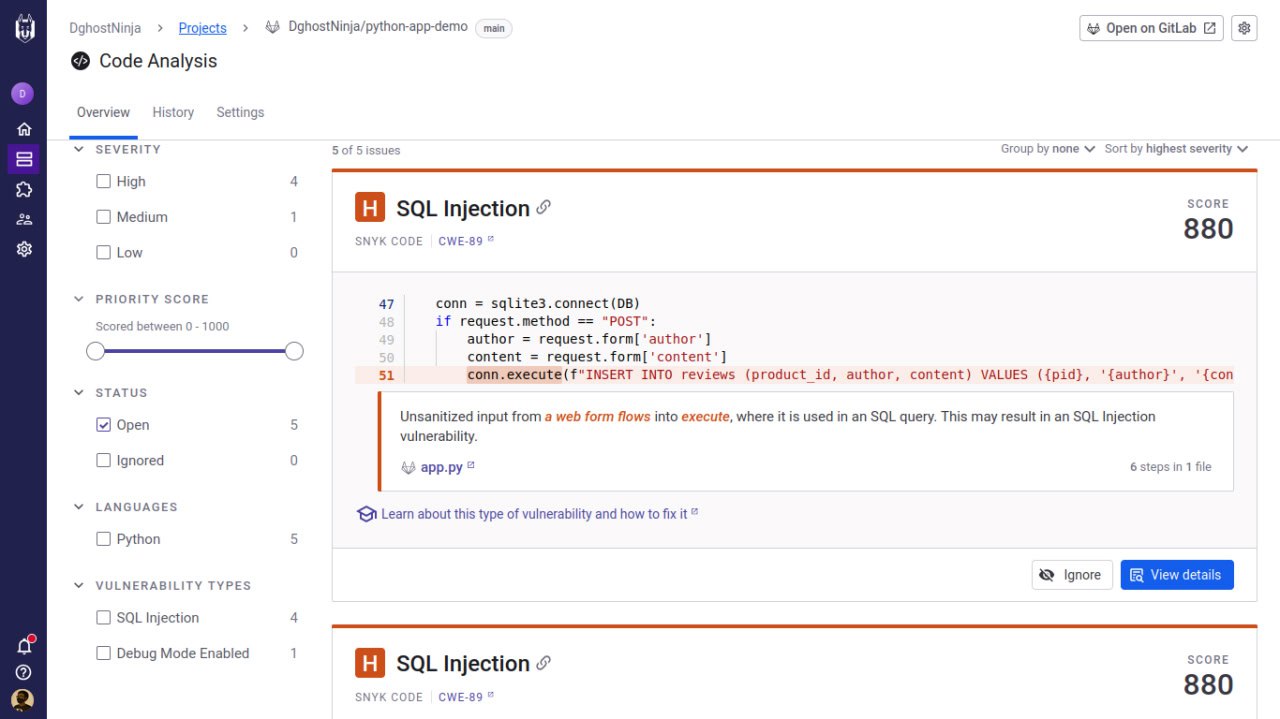
- Snyk - Dependency Scanning
1
2
3
4
5
 snyk_scan:
 image: snyk/snyk-cli:docker
 script:
     - snyk auth "$SNYK_TOKEN"
     - snyk test --file=requirements.txt --json > snyk_results.json
Unlike image-only scans, I used Snyk to deeply inspect requirements.txt and detect vulnerable libraries. Also, integrated Synk by importing the whole codebase and monitoring from the GUI, to avoid any slip up.
- Trivy - Filesystem + Secret + Config Scanner
1
2
3
4
 trivy_scan:
 image: aquasec/trivy:latest
 script:
     - trivy fs . --scanners config,secret,vuln --format json -o trivy_results.json
Trivy catches exposed secrets, insecure configuration files, and vulnerabilities in the file system before building the image.
Step 4: Generating a Security Report
After all scans are complete, a custom Python script, summary.py collates the findings into a security_report.txt. This report is automatically sent to a Telegram channel I created, using a bot token.
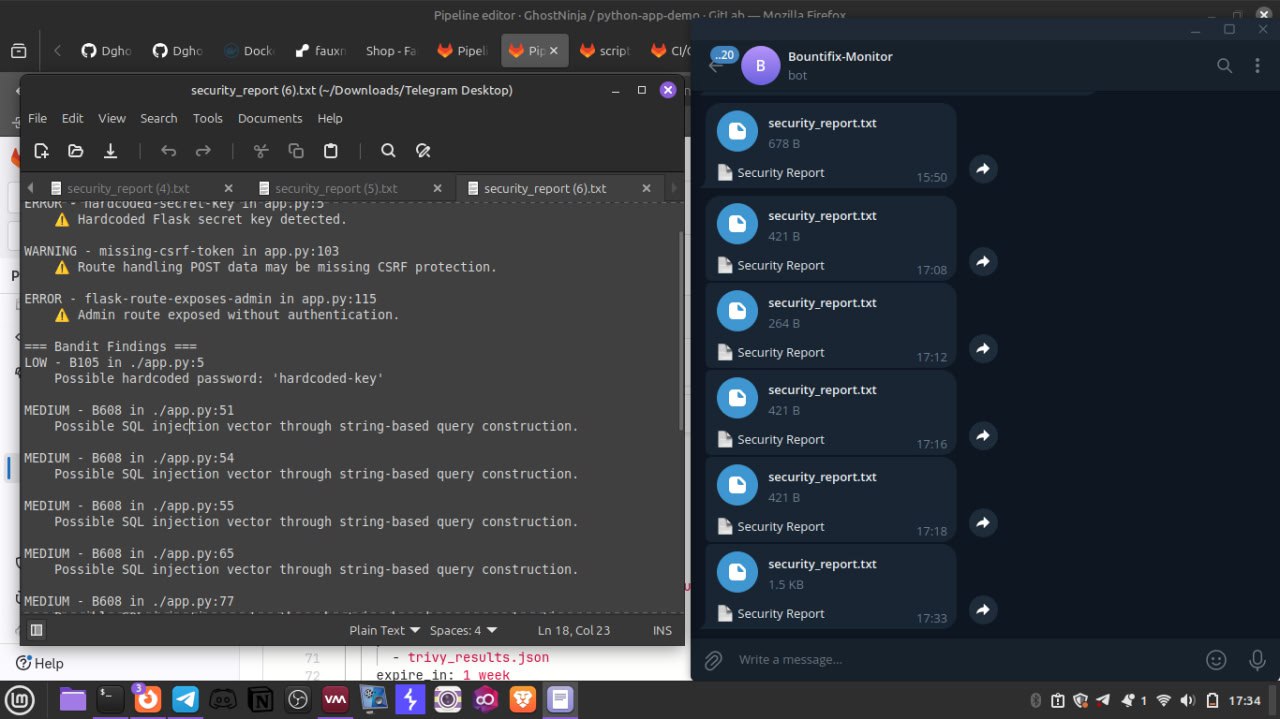
This empowers us with real-time feedback. No need to log in and check dashboards.
Step 5: Docker Image Build and Push
Once all scans complete and the report is sent, the pipeline proceeds to build and push the Docker image to Docker Hub:
1
2
3
4
5
6
7
build_and_push:
  image: docker:latest
  services:
    - docker:dind
  script:
    - docker build -t $DOCKER_IMAGE .
    - docker push $DOCKER_IMAGE
This ensures only post-verified code goes into production containers.
Step 6: Automated Deployment to Render
I deployed using Render’s API via a simple cURL command:
1
2
3
4
5
6
7
trigger_render_deploy:
  image: curlimages/curl:latest
  script:
    - curl -X POST \
        -H "Authorization: Bearer $RENDER_API_KEY" \
        -d '{}' \
        https://api.render.com/v1/services/$RENDER_SERVICE_ID/deploys
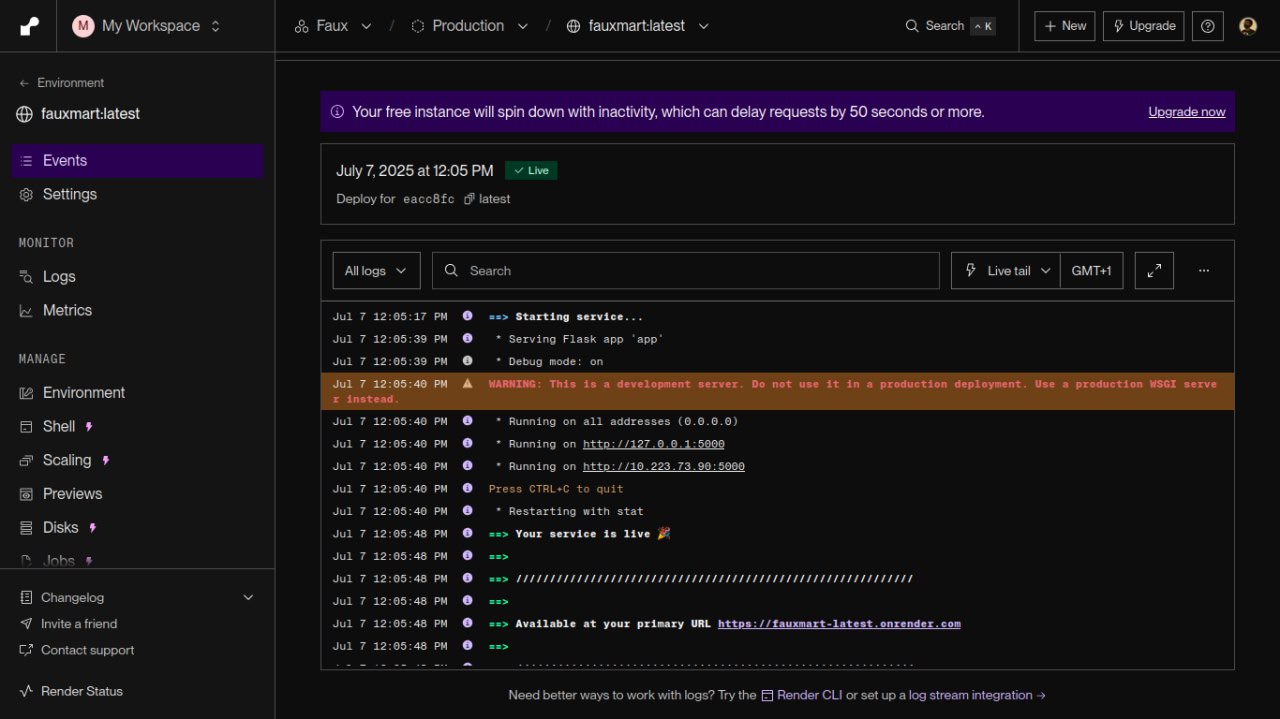
This step automatically redeploys the latest secure image to the production environment.
Notification Integration: Instant Security Alerts
All findings are summarized and posted to a dedicated Telegram group/bot for instant visibility. This is especially useful for small teams and solo engineers who want fast feedback without heavy dashboard tools.
For large teams, Slack or Email can be used instead.
Conclusion
This workflow offers a zero-click security-first CI/CD pipeline that:
Analyzes code and dependencies
Scans for secrets, misconfigurations, and vulnerable packages
Prevents insecure deployments
Sends automated reports to your team
Tools Mentioned
| Tool | Purpose | Link |
|---|---|---|
| Semgrep | Static Application Security | https://semgrep.dev |
| Bandit | Python Code Analysis | https://bandit.readthedocs.io |
| Snyk | Dependency Vulnerability | https://snyk.io |
| Trivy | File/Image Vulnerability Scan | https://aquasecurity.github.io/trivy |
| Render | Deployment Platform | https://render.com |
| GitLab | CI/CD Automation | https://gitlab.com |
Security isn’t an afterthought. it’s built-in